Car Services

Mobile Auto Detailing

Mobile Auto Detailing is a home service that appeals to busy people who want convenience, speed and excellent results.

Auto Detailing

This article will cover all the steps required to get started with a successful mobile detailing business, including start-up costs and necessary tools and equipment. It also includes tips for scalability and efficiency. Visit Website to learn more.

Full-service mobile detailing brings the complete cleaning, restoration, and protection services of a car dealership or auto body shop right to your driveway. This convenient, efficient, and comprehensive approach to maintaining the beauty of your vehicle ensures it is always at its best, without ever having to go out of your way to a service center.

Full exterior mobile detailing starts with a thorough washing, removing dirt and debris that has accumulated over time. This includes the removal of tar, bug remains, road grime, and more, as well as cleaning the wheel wells, tire rims, door jambs, and gas cap. Once the vehicle is completely dry, the detailer applies a protectant to the paint surface, which helps to reduce the amount of dirt and debris that can stick to the vehicle in the future.

The detailer may also use a clay bar to help remove any contaminants that have stuck to the clear coat or broken through it, such as sap, bird droppings, road grime, and more. Once the paint is thoroughly clean, it will be treated with a high-quality wax or sealant to help keep the surface protected from the elements.

Window and mirror cleaning is another crucial part of the full exterior detailing process, as it can greatly improve visibility and safety. Detailing professionals utilize specialized techniques and industry-grade products to ensure windows, mirrors, and glass surfaces are smudge-free and crystal clear.

Another important part of the full interior and exterior detailing process is removing any large items from the vehicle, such as gym bags, work clothes, food containers, and more. This helps to prevent the vehicle from becoming too cluttered, which can lead to diminished performance and safety.

Keeping your vehicle in tip-top shape can feel like a full-time job. To ease this stress and make it easier to maintain, a ceramic coating from MRG Mobile Detailing can be applied to the surface. The hydrophobic properties of the coating repel contamination, make hand-washing a breeze, and protect against UV rays that can damage the surface over time. As a result, your car will stay glossy and beautiful for the long term.

Interior

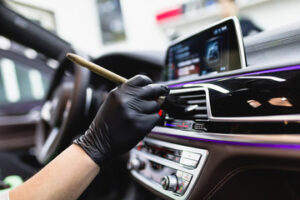
The interior of a vehicle needs special attention to make it look its best. Mobile detailing professionals can wipe down cup holders, air vents, dash and console surfaces. They can also clean and vacuum seats and carpets. If you have leather, they can apply a conditioner to prevent sun damage. They can also remove pet hairs. Depending on your budget and time, you may want to choose extra services like paint protection film or ceramic coating.

Both mobile and shop detailers should have standard safety gear. This includes protective gloves, respirators, sidewinders, face masks, and caps. It is also important to have the right tools to do your job. For example, a professional steam car wash will dissolve gunk much faster than water and a brush. This will save you a lot of time. It will also save you money because you will not need to buy a chemical-based cleaner.

Mobile auto detailing businesses can be less expensive than a traditional brick-and-mortar shop. They typically have lower startup costs and can be established quickly. You can even start with just a van and some cleaning supplies and equipment. You can also use a business software system to streamline management tasks, such as marketing, invoicing, payments, and contacts. This can help you run a profitable detailing business and stay on track with your goals.

If you’re considering opening a mobile car detailing business, do your research first. Look at competitors in your area and find out what customers are looking for. If you can offer something that no one else is, you’ll have a better chance of making your business successful.

A mobile detailing business allows you to work around your schedule and travel to different locations. This is a great option for busy people who don’t have the time to drive their vehicles to a car wash. It also provides flexibility if you decide to change your business model in the future.

The key to a successful mobile auto detailing business is to plan carefully and invest wisely. Ensure you have all the necessary licenses and paperwork in place before starting. You should also be sure to hire employees with the right skills and knowledge. Moreover, you should develop a business strategy and set clear expectations for your employees.

Tires

Of all the surfaces in your car, your tires take the biggest beating. They endure rough roads, sand and salt, acid rain, snow, and other contaminants, and they need regular care to stay in good shape. When detailing your vehicle, make sure you use a tire cleaner with a high pH level to avoid damaging the rubber. You can also choose a tire dressing to protect the rubber against fading, cracking, and discoloration caused by UV rays.

Choosing a reputable mobile auto detailing service is essential for keeping your car in pristine condition. A detailer will treat every nook and cranny, leaving no dirt behind. They will use only the best products and techniques to achieve top results. A professional will be able to work on your car anywhere and at any time, making it convenient for you.

If you have a busy lifestyle, hiring a professional mobile detailer is a great way to keep your vehicle looking its best. Mobile detailers can provide services for all your needs, from washing and vacuuming to shampooing the interior and cleaning the tires. They can even add ceramic coating or PPF to your vehicle, which offers a more comprehensive protection than wax.

Before the detailing process begins, it’s important to remove all accessories that could scratch or damage the surface of your vehicle. This includes long necklaces, bracelets and watches, rings, fanny packs, and chastity belts. Also, remember to turn off your cell phone and any other devices that can distract you from the task at hand.

Headlights

Headlights are a vital safety feature of your vehicle. They allow you to see the road in front of you when it’s dark, as well as help other drivers to recognise your car and gauge how close or far away it is. Modern headlamps are electrically operated and produce both a low and high beam. They are usually positioned in pairs at the front of your vehicle, with one on each side. High-beam headlamps are very bright and will blind other traffic if switched on too frequently. It is recommended to only use them when the road ahead is clear and there are no other vehicles present on the road.

Most headlamps are made of polycarbonate plastic. They are covered at the factory with a protective finish, which is also a UV absorber. Over time this coating can break down causing the headlights to become milky or yellow. This is an aesthetic issue but can be more dangerous as it restricts the amount of light they can produce, creating a potential hazard for other road users.

There are a variety of headlight bulbs on the market, from halogen to xenon. Xenon bulbs are more expensive than halogen and take longer to reach full brightness, but they produce a much brighter light and are able to cut through fog, mist, and snow. Halogen bulbs are cheaper but require a higher voltage to ignite the filament and will burn out quicker than Xenon.

Another option is LED headlights which are very bright and can illuminate a wider area than traditional bulbs. They are also more energy efficient than halogen and Xenon bulbs, but they may not be as bright as a halogen bulb.

If your headlights are cloudy or yellow, Pinehurst Mobile Detailing can restore them to their original condition using a process developed by Bright Solutions. This method is more effective than DIY headlight restoration techniques and can guarantee better visibility when driving at night. We can even apply a sealant to your headlights to protect them from future damage, leaving them looking as good as new.

Roofing

What Is Roofing and How Does Weather Affect It?

The roof is the uppermost part of a building/home that protects against rain, snow, sunlight and extremes of temperature. Roofing is the process of construction and maintenance of this structure.

A roof can be made of many different materials. It can be flat or have a slope. Shakes are split wedges of wood that produce a natural, rugged look; shingles are sawmilled to create clean lines and are less expensive. Contact Roofing Wilmington DE now!

Weather conditions can greatly affect a roof’s performance, especially in areas that experience frequent storms and high winds. Roofing professionals must be mindful of the effect weather can have on repair projects so that they can provide customers with safe and durable solutions. A roof is a structure that covers the top of a building to protect against rain, snow, sunlight, wind, and extreme temperatures. It can be constructed in a variety of shapes and forms, depending on structural or aesthetic considerations.

Material

The material that covers the top of a roof can have a significant impact on its performance. Roofing materials have come a long way in recent years, and they now offer more choices than ever for homeowners who want to select durable products that offer energy efficiency and protection from the elements.

The most common types of roofing are shingles, wood shakes and metal tiles. Asphalt shingle roofs are inexpensive and easy to install, and they have good insulation properties. Wood shingles and shakes are attractive and can add value to your home, but they are not as fire-resistant as other materials and are susceptible to rot and mold. They also require more maintenance than other roofing materials.

Metal roofing is an alternative to traditional shingle roofs, and it offers better protection against hail damage. The most common types of metal roofing are galvanized steel and aluminum, which have excellent fire resistance ratings. In addition to their durability, these materials are also lightweight and can reduce heating and cooling costs.

There are many alternatives to metal and wood, including concrete, ceramic tile, pre-cast concrete and laminated glass. Historically, tile has been the preferred roofing material in many parts of the world, and it can last for centuries if properly installed. Other popular options include corrugated fiberglass, EPDM rubber and Hypalon. These materials have good insulating properties and are available in a variety of colors and styles to complement your home’s exterior. A vapor barrier and membrane can be added to the underlayment to further protect the roof from water infiltration.

Installation

Roof installation is the process of constructing or replacing the roofing system on a structure. It involves carefully placing and fastening various roofing materials to create a weatherproof covering for the building or structure. During the installation process, professional roofing contractors will install flashing, underlayment, shingles, and other necessary components to create a sturdy, watertight covering for the building.

The first step in the roofing installation process is to prepare the roof area. This will involve clearing away any debris, covering anything that shouldn’t get wet or covered in shingle dust, and making sure that access to the roof is clear. The crew will also set up tarps to cover anything they’re working on, so that roofing debris won’t fall and damage the landscaping or cars on your property.

Once the site is prepped, the roofers will begin to remove any existing shingles and underlayment. They will then inspect the roof deck to make sure that it is structurally sound and capable of supporting the new roofing system. If it is not, the roofers will repair or replace it before continuing with the installation.

The next step is to install the underlayment. The roofers will start at the bottom of the roof and work their way up, overlapping each row by about six inches. They will then nail down the underlayment, using a pattern that includes closer nails near the edge and more spread out nails in the middle. The contractor will continue this process until they reach the ridge of the roof, where they will then begin to install shingles. These will be placed over the underlayment, nailed down firmly, and sealed with a layer of roofing cement.

Maintenance

The roof is one of the most vital components of a structure providing aesthetic value and all-round protection. It is essential to have proper maintenance procedures to prolong the life of your roof and save you from expensive repairs. These procedures include inspections for water damage, mildew, leaks and molds; identifying areas of deterioration; and addressing minor defects before they escalate into major problems.

A thorough inspection of the shingles, flashing and other roof materials is critical to ensure their longevity. A good inspection should be conducted at least once every year, but more often in geographic areas that experience extreme weather patterns. The inspection should also include an examination of the chimney, ventilation pipes, skylights and other accessories. Checking the caulking on these accessories is important, as they may be the source of water leaks if the sealant is damaged or failing. It is also recommended to look for moss and lichen growth as these can promote moisture buildup and cause premature deterioration of the roofing material.

In addition to a general roof inspection, it is a good idea to inspect the trusses and beams on the interior of the building for signs of stress that can be caused by improper support or inadequate load bearing capacity. It is also important to periodically inspect for ice dams and other structural defects that could cause the collapse of the roof.

On flat roofs, it is necessary to periodically trim the surrounding trees and vegetation so they do not overhang or obstruct the roof surface. This will help prevent puncture or abrasion of the roof membrane, and clogging of drains. It is also recommended to check that all gutters and downspouts are free from obstructions and debris, as this can clog the drains on flat roofs and lead to water damage and structural decay.

It is a good idea to have an emergency response plan for any roof damage or leaks that occur, as these can be costly and disrupt the normal operations of the facility. This should include a list of contact numbers for qualified contractors, as well as procedures for shutting off the water and drying out any materials that have been saturated by leaks or flooding.

Getting Started

Your roof is an integral part of your home, protecting you and everything within from harsh weather conditions and falling debris. However, even the sturdiest roof can succumb to damage over time. When that happens, it is important to take the proper steps to address it quickly and effectively to preserve your property and prevent further damage.

While replacing your roof may be the best option in severe cases of damage, a repair is often a more cost-effective and less invasive solution. Roof repair focuses on fixing specific components of your roof that are leaking or having other minor issues, rather than removing and replacing the entire roof. Whether you need to repair your roof after a recent storm or because of aging, it is important to make the right decision to protect your investment.

If you decide to opt for a roof repair, there are some things that you can do to prepare. First, be sure to choose the right contractor for the job. Experienced roofing contractors bring a wealth of knowledge and expertise to the table that can help ensure your project is a success. Additionally, choosing a contractor with a good track record can help reduce the risk of problems during and after the installation process.

Roofing

Awning Installation Tips

Awning Installation Phoenix is a fairly straightforward project for the DIY-er. It is a great way to add character and value to your property.

Awning Installation

Brick walls, mortar walls, or faux stucco may require special mounting procedures. These usually rely on backer material like OSB, plywood, or framing members to support the weight.

Before you purchase an awning, measure the height of your wall where you would like it to be mounted. You want to make sure that the awning is not too high or too low and that you have enough space for it to fit comfortably.

You also need to determine how far out the awning will project. This is called the projection. Typically, you want the projection to be half a meter shorter than the width of the awning. This allows for proper shading.

Once you have your measurements, you can determine the size of awning that you need. This will help you narrow down the choices at your local home improvement store. Using the width, projection, and height that you have calculated, you can then choose the model that will best suit your needs.

When you are ready to install your awning, first use a stud finder or drill a test hole in the wall to ensure that there is a rafter or joist underneath, which will support your awning. Once you are satisfied that your awning will be able to withstand the weight, carefully mark the location of the mounting brackets. It is a good idea to place the marks over a house feature, such as a door or window. This will allow you to envision the results and to see if the awning is centered over that house feature.

Before installing your awning, you should also open your soffit to check the condition of the rafters or joists. They need to be strong and able to support the weight of your awning. If the joists or rafters are not straight or if there are slanted areas, you will need to use rafter adaptors to ensure a safe installation.

After marking the installation location, you can start to install the joists or rafters. Once you are finished with this step, you can mount the awning brackets. It is important to remember that these should be placed at least every 16 inches along the joists or rafters. If you are unsure of how to do this, consult with a professional to avoid any damage or injury.

Determine the Pitch

The pitch is an important factor in determining how well your awning functions. Ideally, the awning should have a steep pitch, which will make it easier for rainwater to slide off without pooling. This can help prevent the awning from becoming damaged or mildewed over time. The pitch is also important because it can influence how much shade an awning provides. For instance, if your awning has too shallow a pitch, it will provide little protection from the sun. A steeper pitch will give you more shade and help prevent water from pooling on top.

To determine the pitch, first find out how high you want the awning to be. Then, divide the desired awning height by the awning width to get the awning’s pitch. This is the angle that the awning will slope from back to front. Once you have the awning’s pitch, you can calculate its projection using this handy online calculator. This will show you how much space the awning will cover when it is fully extended.

Before starting your awning installation, consult the manufacturer’s instructions and plan your project carefully. Be sure to take into account the amount of time you’re willing to spend on it and the tools you’ll need to complete the job. It’s also a good idea to check with your homeowner’s association and local building codes before beginning the project.

Ensure that the area where you’re planning to install your awning is free from obstructions like exterior lights, speakers, air vents, gutters, and building trim. It’s also a good idea for someone to assist you in moving, steadying, or lifting the awning and any heavy or unwieldy components. Finally, you’ll need to decide whether you want the awning to be motorized or manually operated and purchase the appropriate mounting brackets for your situation.

To mount an awning, you’ll need a ladder that’s at least as tall as the awning and a sturdy pair of work gloves. You’ll also need to have access to load-bearing structural components such as wall studs or beams. Lastly, it’s a good idea to wear safety glasses when working on a ladder.

Determine the Material

When it comes to awning installation, there are many options available. Choosing the right fabric and frame for your awning is an important step, as it will determine the quality and appearance of the shade. The best awnings are made from high-quality materials that resist damage from the elements. They also provide protection from the sun and rain and come in a variety of colors and styles to match your home’s exterior.

When you’re ready to install your awning, make sure that the location is free of obstructions such as exterior lights, gutters, or other objects that could interfere with the proper operation of the awning. Additionally, check that the location is clear of any load-bearing structural components such as wall studs or the header on a window or door frame. If necessary, consult a professional for help in selecting an ideal location for your awning.

Once you have a clear, unobstructed area to work in, it’s time to install the frame and begin mounting the awning. Begin by inspecting the packaging to ensure that all parts are present. Then, read the manual to familiarize yourself with the instructions. When assembling the awning, be careful to follow all directions and avoid leaving loose or missing pieces. Finally, attach the hardware and test the awning to make sure that it functions properly.

Awning frames are typically constructed from aluminum or steel, which makes them lightweight and resistant to corrosion. These materials are also easy to maintain and can be painted or stained to match the exterior paint of your home.

The fabric that covers your awning should be fade-resistant, waterproof, and easy to clean. There are several awning fabrics to choose from, including cotton, acrylic, and vinyl. Each has its own benefits and disadvantages.

Cotton is a natural, breathable material that provides excellent shade and offers good resistance to mold and mildew. It’s suitable for both fixed and retractable awnings. Acrylic is a synthetic fabric that feels like wool and offers great fade resistance. It’s a popular choice for both fixed and retractable awnings, although it can cost up to ten times more than cotton.

Determine the Location

Awnings can make a dramatic impact on the look of a home. They can complement or contrast with the color of a house’s siding and create an upscale appearance. An awning can also be installed over a window or door to provide shade and privacy. An awning can even increase a home’s value. Aside from making a home more attractive, an awning can protect people and their pets from high temperatures and direct sunlight, which can be dangerous.

Before installing an awning, it is important to determine the location. Awnings are available in several sizes, shapes, and styles, and the exact location of the awning will depend on the size of the patio, the direction the sun travels during the day, and the amount of shade that is desired. Additionally, it is essential to keep in mind the safety of any potential users and whether or not the awning will be manual or motorized.

Ensure there is sufficient clearance for the awning to extend. If not, it may be necessary to install the awning over an overhang like a soffit or fascia or on the roof. Use a stud finder or drill a test hole to ensure there is a stud, rafter, or beam underneath the location where you plan to mount the awning. If there is not, a foundation may need to be constructed before the awning can be mounted on top of it.

If the awning will be motorized, the location of the hood unit is critical to the operation of the awning. Ensure there is enough clearance for the Hood Unit to be lowered and raised when needed. The height at which it is positioned will also affect how much shade or light can be provided when the awning is extended.